


Hey there! As a vinyl glove supplier, I'm super excited to walk you through the production process of vinyl gloves. It's a pretty fascinating journey from raw materials to the finished product that you see on the shelves or in your hands.
Step 1: Gathering the Raw Materials
The first step in making vinyl gloves is getting all the necessary raw materials. The main ingredient is polyvinyl chloride (PVC) resin. This is a type of plastic that's widely used in all sorts of products because it's durable, flexible, and relatively inexpensive. We also need plasticizers, stabilizers, and other additives. Plasticizers are used to make the PVC more flexible and soft, while stabilizers help prevent the PVC from breaking down when it's exposed to heat or light.
We source our raw materials from reliable suppliers. It's really important to get high - quality materials because they directly affect the quality of the final gloves. We always do strict quality checks on the raw materials before we start the production process.
Step 2: Mixing the Ingredients
Once we have all the raw materials, it's time to mix them together. We put the PVC resin, plasticizers, stabilizers, and other additives into a large mixer. The mixer rotates at a high speed, thoroughly blending all the ingredients. This process usually takes a while to ensure that the mixture is completely homogeneous.
During the mixing process, we also heat the mixture to a certain temperature. This helps the plasticizers and other additives to dissolve evenly in the PVC resin. The temperature and mixing time are carefully controlled according to the specific formula of the vinyl gloves we're making. Different types of gloves may require different mixtures, depending on their intended use, such as medical, industrial, or household applications.
Step 3: Making the Vinyl Compound
After the mixing is done, we end up with a thick, viscous vinyl compound. This compound is then transferred to an extruder. An extruder is a machine that forces the vinyl compound through a small opening, shaping it into a long, continuous tube - like shape.
The extruder also heats the vinyl compound further to make it more malleable. As the compound comes out of the extruder, it's cooled down quickly using water or air. This helps to set the shape of the tube and makes it easier to handle in the next steps.
Step 4: Preparing the Glove Molds
While the vinyl compound is being prepared, we also get the glove molds ready. The glove molds are usually made of ceramic or metal and are shaped like human hands. They come in different sizes to produce gloves of various sizes.
Before using the molds, we need to clean them thoroughly to remove any dirt, dust, or debris. Then, we apply a release agent to the surface of the molds. The release agent helps the vinyl gloves to easily separate from the molds after they're formed.
Step 5: Dipping the Molds
Now comes the crucial step of dipping the molds into the vinyl compound. The cleaned and coated molds are dipped into a tank filled with the vinyl compound. The depth and duration of the dip determine the thickness of the gloves. For thinner gloves, the molds are dipped for a shorter time and to a shallower depth, while for thicker gloves, the process is reversed.
After the first dip, the molds are lifted out of the tank and allowed to drain for a short period. This helps to remove any excess vinyl compound. In some cases, the molds may be dipped multiple times to build up the thickness of the gloves or to add additional layers for special features, like textured surfaces for better grip.
Step 6: Gelling and Curing
Once the dipping is done, the molds with the wet vinyl on them are moved to an oven. In the oven, the vinyl is heated to a specific temperature for a set period of time. This process is called gelling and curing.
During gelling, the vinyl starts to solidify and take on the shape of the mold. The heat causes the PVC molecules to cross - link, making the gloves stronger and more durable. The curing process further strengthens the gloves and ensures that they have the right physical properties, such as elasticity and tear resistance.
The temperature and time in the oven are carefully monitored. If the temperature is too low or the time is too short, the gloves may not cure properly, resulting in weak and easily damaged gloves. On the other hand, if the temperature is too high or the time is too long, the gloves may become brittle.
Step 7: Stripping the Gloves from the Molds
After the gelling and curing process is complete, the gloves are ready to be removed from the molds. This is called stripping. We use automated machines or manual labor to gently pull the gloves off the molds.
The stripping process needs to be done carefully to avoid damaging the gloves. Once the gloves are stripped, they're inspected for any defects, such as holes, tears, or uneven thickness. Any defective gloves are removed from the production line.
Step 8: Post - Treatment and Packaging
The non - defective gloves then go through some post - treatment processes. For example, they may be washed to remove any remaining chemicals or debris from the production process. Some gloves are also powdered to make them easier to put on and take off. However, in recent years, powder - free gloves have become more popular, especially in the medical field, due to concerns about powder causing allergic reactions.
After the post - treatment, the gloves are sorted by size and quality. They're then packed into boxes or bags. The packaging is designed to protect the gloves during storage and transportation. We label the packages with information such as the size, type, and quantity of the gloves.

Step 9: Quality Control
Throughout the entire production process, quality control is of utmost importance. We have a team of quality control inspectors who check the raw materials, the intermediate products, and the finished gloves at various stages.
They use a variety of testing methods, such as visual inspection, physical testing, and chemical analysis. For example, they may test the gloves for their tensile strength, elongation, and puncture resistance. They also check for the presence of any harmful chemicals, especially in medical gloves, to ensure that they meet the relevant safety standards.
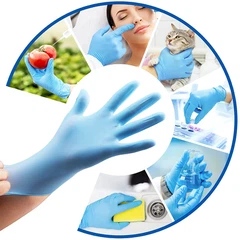
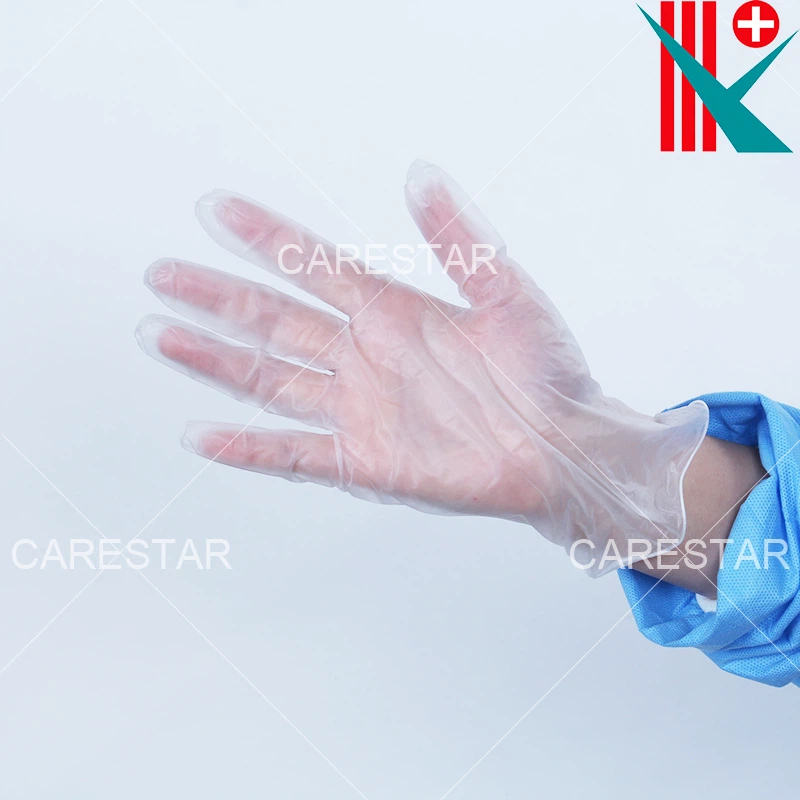
Why Choose Our Vinyl Gloves?
Our vinyl gloves are produced with the highest standards of quality and safety. We use only the best raw materials and state - of - the - art production equipment. Whether you need Vinyl Gloves for medical, industrial, or household use, we have the right product for you.
If you're interested in purchasing our vinyl gloves, we'd love to have a chat with you. We can discuss your specific requirements, such as the quantity, size, and features of the gloves. Our team is always ready to provide you with the best service and the most competitive prices. So, don't hesitate to reach out and start a conversation about your vinyl glove needs.
References
- "Plastics Technology Handbook" by James F. Carley
- "Handbook of Vinyl Formulating" by Edward J. Wickson